
Setting up an Ice Cream Cone Machine—whether it is a waffle cone maker, sugar cone machine, wafer cone baking machine, or a fully automatic ice cream cone production line—is one of the most important steps before starting cone manufacturing. A properly installed machine ensures stable baking temperature, uniform cone color, high efficiency, and long service life.
Many buyers purchase the equipment but do not know the correct installation procedure. This often leads to uneven baking, machine errors, or inconsistent cone quality. This guide will walk you through every step of installation, from workshop preparation to calibration and test production.

1. Why Proper Installation Is Crucial
A high-quality Ice Cream Cone Machine can operate 24 hours continuously, but only when it is installed correctly.
Proper setup ensures:
- Stable heat distribution
- Optimal cone texture and crispiness
- Lower gas or electricity consumption
- Smoother production flow
- Reduced maintenance cost
- Less downtime
- Consistent product quality
Incorrect installation may lead to:
- Burnt or undercooked cones
- Uneven cone color
- Batter leakage
- Excessive fuel use
- Broken or cracked cones
- Production interruptions
Therefore, understanding the correct setup process is essential for any manufacturer starting a cone production business.
2. Preparing the Workshop Before Installation
Before placing the industrial cone maker, prepare the workshop according to machine requirements.
2.1 Space Requirements
A standard rotary ice cream cone oven or wafer cone baking machine needs:
- Clear space around the machine: 1–1.5 meters for maintenance
- A flat, level ground
- Smooth workflow space for operators
- Room for batter mixer, conveyor, and packing station
For fully automatic production:
- Additional space for cooling conveyor
- Cone counting system
- Packaging section
2.2 Environmental Requirements
Ice cream cone production requires a controlled environment:
- Temperature: 10–35°C
- Humidity: <75%
- Dust-free and dry
- Good air circulation
- No direct sunlight on the baking section
High humidity may soften the cones or cause storage issues.
2.3 Energy Supply Preparation
Depending on the machine type:
Gas Heating Ice Cream Cone Machines
- LPG or natural gas line
- Gas pressure regulator
- Explosion-proof gas valve
- Steel or certified rubber pipes
- Proper ventilation
Electric Heating Ice Cream Cone Machines
- 380V three-phase
- Stable voltage (±5%)
- Proper grounding
- Voltage stabilizer (recommended for Africa, Latin America, South Asia)

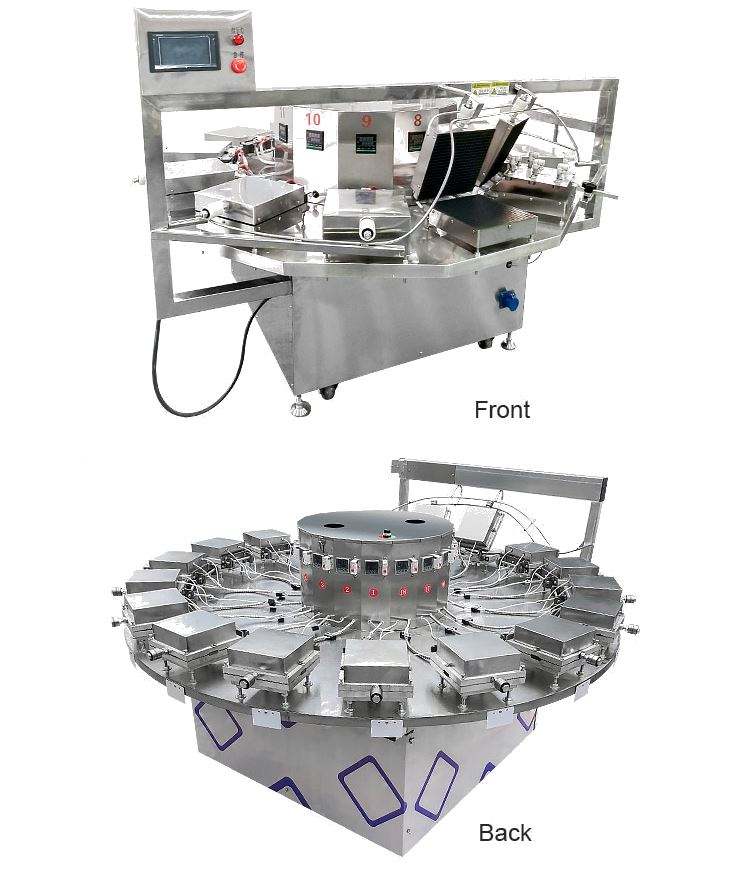
3. Checking the Ice Cream Cone Machine Before Installation
When you receive the equipment, inspect the following components:
- Baking molds / plates
- Gas burners or heating tubes
- Electrical cabinet
- Transmission chain
- Cone rolling molds
- Batter pump
- HMI/PLC control panel
- Cooling conveyor
- Spare parts (springs, belts, sensors, fuses)
Check for transportation damage or loose fasteners.
4. Step-by-Step: How to Set Up an Ice Cream Cone Machine
Below is the complete setup process for both semi-automatic cone makers and automatic industrial cone production lines.
Step 1: Position the Machine Correctly
Place the waffle cone maker machine or rotary wafer cone baking oven on a flat surface.
Requirements:
- Keep 1 meter space around
- Use a level ruler to ensure stability
- Avoid humid or uneven floors
- Leave space for batter feeding and cooling system
Correct placement prevents vibration and ensures even baking.
Step 2: Connect the Gas System (If Applicable)
Gas-fired sugar cone machines require stable pressure.
2.1 Pipeline Connection
Use:
- Independent gas pipeline
- High-pressure regulator
- Steel pipes
- Teflon sealing tape
2.2 Gas Pressure Requirements
- LPG: 30–50 mbar
- Natural gas: 15–25 mbar
2.3 Safety Inspection
- Apply soap water to joints to check leakage
- Ensure exhaust fan is working
- Install emergency gas shutoff
Never start burners until leak testing is completed.
Step 3: Connect the Electrical System
Even for gas heating machines, the controls require electricity.
Check the following:
- Grounding wire
- Main power switch
- Control cabinet wiring
- Relay connections
- Emergency stop function
- PLC/HMI boots successfully
Electrical Requirements
- Three-phase 380V
- Stabilized voltage
- Secure grounding (<4Ω)
Step 4: Install the Batter Mixing & Feeding System
Your ice cream cone processing machinery needs a consistent batter feeding system.
4.1 Batter Mixing Machine
Prepare batter with:
- Flour
- Sugar
- Water
- Oil
- Flavoring
Mix for 10–20 minutes for consistency.
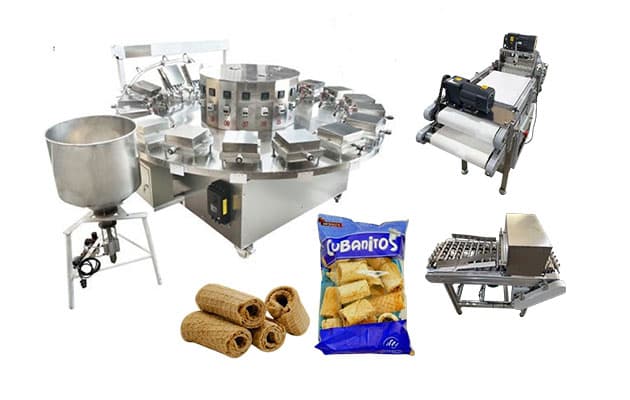
4.2 Connect Batter Pump
- Use food-grade hoses
- Check for leaks
- Ensure smooth suction and output
4.3 Adjust Filling Amount (Dosing)
Dosing determines cone thickness:
- Small cones: 8–15g
- Medium cones: 12–25g
- Large cones: 20–40g
Adjust through PLC or mechanical valve depending on model.
Step 5: Dry Run (No Batter)
Before adding batter, run the industrial cone maker empty.
Check:
- Transmission chain motion
- Plate rotation
- Gas flame condition
- Electric heating response
- Motor noise
- Temperature increase
Preheating usually takes 8–12 minutes.
Step 6: Add Batter and Start Test Production
Once preheated, begin the first test batch.
- Start the dosing system
- Let batter enter molds
- Observe baking quality
- Check cone color uniformity
- Adjust thickness if needed
6.1 Temperature Control
Typical settings:
| Cone Type | Temperature |
|---|---|
| Wafer cones | 160–180°C |
| Sugar cones | 180–200°C |
| Waffle cones | 190–220°C |
6.2 Baking Time
Depends on model:
- 45–90 seconds per cycle
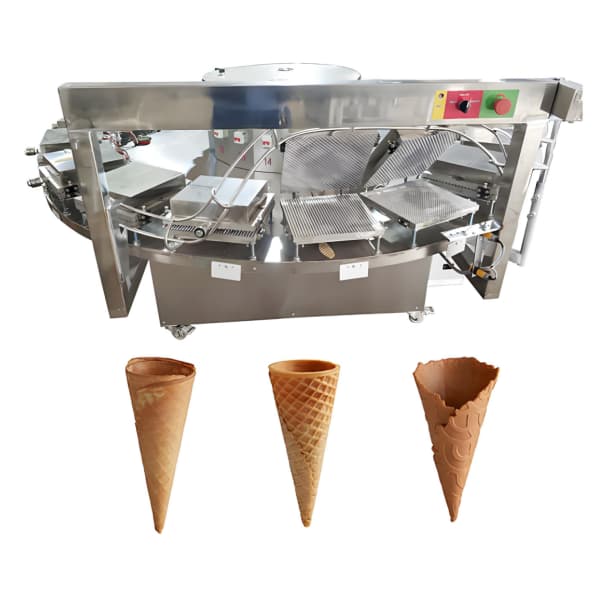
Step 7: Adjust the Cone Rolling System
The cone must be perfectly shaped.
Check:
- Tip closure
- Wall thickness
- Shape accuracy
- No cracks
Adjust:
- Rolling pressure
- Mold alignment
- Cone mandrel temperature
Step 8: Cooling and Moisture Stabilization
Fresh cones are still soft.
Cooling is done via:
- Air cooling tunnel
- Conveyor belt
- Cooling tray
Cooling time: 2–6 minutes.
Proper cooling prevents deformation.
Step 9: Final Quality Testing
Inspect:
- Cone color
- Crispiness
- Shape and angle
- Length
- Smoothness
- No bubbles or holes
Only after stable quality appears should the production start officially.
5. Common Issues and Solutions During Setup
Problem 1: Uneven cone color
- Uneven gas flame → clean burners
- Wrong temp → adjust heating
- Uneven dosing → calibrate pump
Problem 2: Batter leakage
- Plates not closed tightly → adjust hinge
- Too much batter → reduce dosage
Problem 3: Cones breaking easily
- Pressure too high → adjust forming mold
- Too little moisture → adjust recipe
Problem 4: Cones sticking to plates
- Dirty molds → clean & oil
- Overheated plates → stabilize temperature
6. Safety Requirements
Gas Heating Safety
- Check leakage daily
- Install gas cutoff valve
- Maintain ventilation
- Keep fire extinguisher nearby
Electrical Safety
- No water near control cabinet
- Avoid overloading
- Tighten connections regularly
Operator Safety
- Use heat-resistant gloves
- Do not bypass safety sensors
- Keep clothing away from moving parts
7. Training Requirements for Operators
Every operator should learn:
- Batter mixing ratios
- Temperature and time control
- Proper dough feeding
- Mold adjustment
- Troubleshooting
- Daily cleaning procedures
Good training greatly reduces waste and improves efficiency.
8. Daily Operation Checklist
Before starting the machine:
- Preheat for 10 minutes
- Check gas or electricity
- Confirm dosing volume
- Clean molds
- Ensure chain lubrication
- Test cone quality every hour
9. Maintenance Guide
Daily
- Clean plates
- Remove residue
- Wipe cone molds
Weekly
- Lubricate bearings
- Check chain tension
- Inspect burners
Monthly
- Full machine inspection
- Safety test
- Check PLC and sensors
With proper maintenance, your Ice Cream Cone Machine will last 8–12 years or more.
Set up Ice Cream Cone Machine
Setting up an Ice Cream Cone Machine, whether it’s a waffle cone maker, sugar cone production machine, industrial wafer cone baking equipment, or automatic cone making line, is the key to ensuring stable production and high-quality cones.
By preparing the workshop correctly, connecting gas and electricity safely, calibrating dosing, adjusting molds, testing baking results, and training operators, your factory will achieve:
- Consistent cone color
- High efficiency
- Stable 24-hour operation
- Lower operating cost
- Faster ROI